Your Recovery Points Are a Lie: What Actually Happens When the Load Gets Real
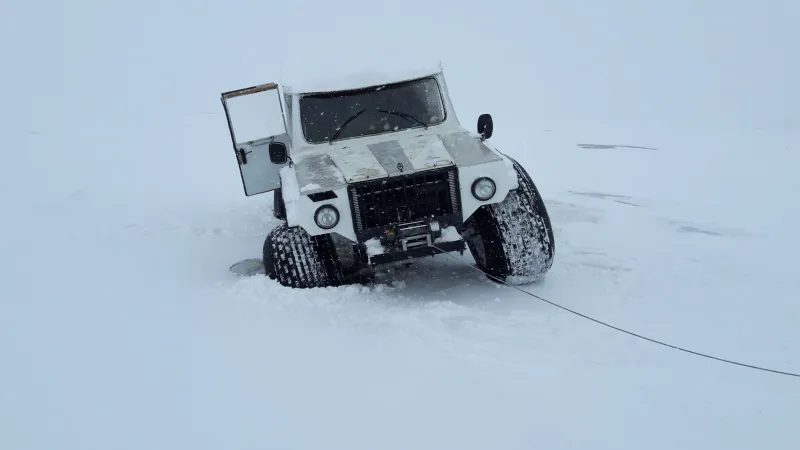
You've got a 9,500-pound winch, a quality synthetic rope, and a snatch block rigged like a pro. You're stuck axle-deep in a Utah clay pit, the mud is rising, and you give the signal to pull. Then something goes crack — and it's not the mud letting go.
It's your recovery point.
This scenario plays out on trails across the country more often than anyone in the off-road community likes to admit. Recovery hardware failure isn't just embarrassing — it's genuinely dangerous. A shackle, hook, or mounting plate that lets go under tension becomes a projectile with enough force to kill. And the frustrating truth is that most rigs on the trail right now are running recovery points that are either underspec'd, improperly installed, or quietly compromised in ways the owner has never thought to check.
Let's fix that.
The Gap Between the Sticker and Reality
When a manufacturer rates a recovery point at 8,000 pounds, that number deserves some serious scrutiny. Rated load capacity — sometimes called Working Load Limit, or WLL — is not the same as the force your rig will experience during a dynamic recovery. Static pulls are one thing. But a stuck vehicle that suddenly breaks free, a snatch strap under snap-load tension, or a winch pulling at an angle can spike forces well beyond what a simple straight-line rating suggests.
Industry standard practice in rigging and recovery is to apply a safety factor of at least 3:1, meaning your hardware should be rated to handle three times the maximum expected load. For a full-size truck or SUV weighing in around 6,000 to 7,000 pounds, you're looking at recovery hardware that should comfortably handle 20,000 pounds or more. A lot of the budget recovery points flooding the market — and even some OEM options — don't come close.
The spec sheet is a starting point, not a guarantee.
What's Actually Holding Your Recovery Point to the Truck
Here's where things get uncomfortable for a lot of wheelers: the recovery point itself is often stronger than what it's bolted to.
Factory tow hooks on most light trucks and SUVs are designed for towing assistance in controlled, low-speed situations — think getting nudged out of a ditch by a tow truck. They're typically bolted to the frame with hardware that's adequate for that purpose and not much more. The frame mounting points themselves, the bolt grade, the thread engagement, the backing plate (if there even is one) — all of it matters the moment you start applying serious recovery loads.
A common failure mode isn't the hook bending or the shackle breaking. It's the bolts pulling through sheet metal, or a mounting tab tearing away from the frame entirely. You can have a 30,000-pound-rated hook that does absolutely nothing to save you if the two Grade 5 bolts holding it to a stamped steel bracket let go first.
Aftermarket bumpers with integrated recovery points solve part of this problem by distributing load across more of the frame — but only when they're properly installed. A receiver-style bumper that's just resting on the factory bumper mounts without being tied into the frame rails is still a weak link waiting to happen.
The Angle Problem Nobody Talks About
Recovery hardware is almost always rated for straight inline pulls. Real-world recoveries almost never are.
When your rig is buried at an angle, when the anchor point is off to the side, or when you're using a snatch block to redirect the pull, the load dynamics change significantly. Side-loading a shackle — pulling it at an angle to the pin axis — can reduce its effective strength by 50 percent or more depending on the angle. That's not a small margin of error.
The fix isn't complicated, but it requires awareness. Use shackles with a bow (D-ring shackles) rather than screw-pin shackles for anything that might see an angled load. Orient your hardware so the load runs through the strongest axis. And when you're setting up a redirect, think through the geometry before you start pulling.
How to Actually Audit Your Recovery Infrastructure
Before your next trail run, spend twenty minutes doing a proper recovery point inspection. Here's what to look for:
Check the mounting hardware first. Get under the rig and look at every bolt holding your recovery points to the frame. Are they the correct grade for the application? Grade 8 minimum is a reasonable baseline for recovery hardware. Are they torqued properly and showing no signs of movement or wallowing in the holes? Any rust, corrosion, or stripped threads is a red flag.
Look for cracks and deformation. Any recovery point that has seen a hard pull should be inspected for micro-cracking, bending, or distortion around the attachment area. Metal that has been stressed past its yield point is compromised, even if it looks mostly fine.
Check your shackles. Screw-pin shackles have a nasty habit of backing themselves out under vibration and dynamic load. If you're running screw-pin D-rings, the pins should be moused (secured with wire or a zip tie through the pin hole) to prevent rotation. Better yet, switch to twist-lock or screw-pin shackles with a locking mechanism for your primary recovery points.
Know your ratings and do the math. Add up the WLL of every component in your recovery system — the point, the shackle, the rope or strap, the anchor. The weakest link defines your system's limit. Then apply that 3:1 safety factor and honestly assess whether your setup is appropriate for your rig's weight and the terrain you run.
Don't forget the rear. A lot of wheelers upgrade their front recovery points and completely neglect the rear. Getting pulled backward out of trouble is just as common as getting pulled forward, and a factory trailer hitch receiver is not a recovery point — no matter how many people treat it like one.
Aftermarket Isn't Automatically Better
The off-road market is flooded with recovery hardware from manufacturers you've never heard of, priced aggressively and marketed with impressive-sounding numbers. Some of it is fine. A lot of it isn't.
When you're buying aftermarket recovery points, shackles, or soft shackles, look for products that have been independently tested and certified — not just self-rated by the manufacturer. For shackles, Crosby and Van Beest are the gold standards in the US market. For soft shackles, brands like Factor 55 and ARB have earned their reputations through real-world use. Spending an extra thirty dollars on hardware you can actually trust is one of the easiest risk-reduction decisions you can make.
The Bottom Line
Recovery gear only matters when things go wrong — which means it needs to work perfectly under the worst conditions you'll ever encounter on the trail. The hardware is only as good as its weakest connection point, and that connection point deserves the same attention you give to your tires, your suspension, and your winch.
Audit your recovery infrastructure before you need it. Know your load ratings, check your mounting hardware, and stop assuming that because something looks solid, it actually is. Out on the trail, the difference between a successful self-recovery and a genuine emergency can come down to two bolts and a shackle pin.
Don't let it be yours.