Stop Trusting the Sidewall: How to Actually Dial In Your Off-Road Tire Pressure
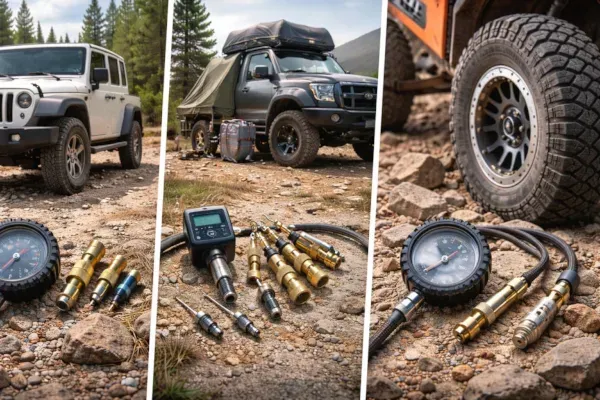
Photo: off-road tire pressure gauge airing down 4x4 truck trail, via blogger.googleusercontent.com
Here's a conversation that happens at trailheads across the country every single weekend. Someone pulls up, pops out of their rig, and another wheeler glances at the tires and asks, "What are you running?" They're not asking about the brand. They're asking about pressure. And more often than not, the answer is something like, "Uh… whatever they were at when I left the house."
That's a problem.
Tire pressure is one of the most impactful — and most misunderstood — tuning variables in off-road driving. It costs nothing to adjust, requires only a gauge and a few minutes, and can be the difference between floating over a sand wash and digging yourself a hole you can't get out of. Yet most people treat it like a set-it-and-forget-it spec, trusting either the factory sticker inside the door jamb or the max PSI number stamped on the sidewall.
Neither of those numbers was written with your trail in mind.
What That Sidewall Number Actually Means
Let's clear this up right away. The PSI figure on your tire's sidewall — say, 80 PSI on a common light truck tire — is the maximum cold inflation pressure the tire is rated to handle at its maximum load capacity. It is not a recommendation. It's a ceiling. Running your tires at that number on pavement would give you a rock-hard contact patch, a punishing ride, and reduced traction. Running them there on a trail is a recipe for a blowout the moment you find a sharp edge.
Your door jamb sticker is closer to useful — it reflects the OEM's recommendation for your specific vehicle at a typical load on paved roads. But the moment you add a roof rack, a full load of camping gear, a bumper, and a winch, that number shifts. And the moment you leave the pavement, it shifts again.
The Contact Patch Is Everything
Here's the core concept that should guide every PSI decision you make off-road: tire pressure controls the size and shape of your contact patch — the actual footprint of rubber touching the ground. Lower pressure means a larger, more compliant patch. Higher pressure means a smaller, stiffer one.
On the trail, a larger contact patch is almost always your friend. It distributes weight across more surface area, improves grip on uneven terrain, and lets the tire conform around rocks and roots rather than bouncing off them. The tire essentially wraps itself around obstacles instead of fighting them.
But there's a floor. Go too low and you risk bead separation — the tire rolling off the rim entirely. That's a bad day no matter where it happens.
Terrain-by-Terrain Pressure Guide
Sand: This is where airing down makes the biggest difference. Experienced desert runners — think the dunes at Glamis or the beaches of the Outer Banks — often drop to 10–15 PSI in 35-inch and larger tires. That massive footprint keeps you floating on top of the sand instead of digging in. At street pressure, you're just spinning and sinking. At 12 PSI, the same rig walks across the surface. The tradeoff? You need a quality bead lock or at least bead lock-style wheels, and you need to air back up before hitting any paved stretch at speed.
Rocky Terrain: Think Moab, the Rubicon, or any technical crawler trail. Here you want compliance and grip more than float. Most experienced rock crawlers run somewhere in the 18–25 PSI range depending on tire size and vehicle weight. That cushion lets the tire deform around rocks, improving traction and reducing the jarring impacts that can crack beads or damage sidewalls. Going too low on rocks, however, increases sidewall vulnerability to punctures — so don't chase sand numbers here.
Mud: Mud is the wild card. Some wheelers air down aggressively to maximize the contact patch and let the tire dig in. Others keep pressure slightly higher to let aggressive tread patterns self-clean more efficiently. The honest answer is it depends on the mud — thick clay versus loose loam behaves very differently. A good starting point for most rigs is around 20–25 PSI, then adjust based on what you're seeing. If you're spinning and floating on top, air down. If you're packing mud and losing momentum, consider airing up slightly and letting the tread do its job.
Snow and Ice: Cold weather adds another variable: temperature drops pressure. A tire that was at 30 PSI in your warm garage might read 26 PSI at a trailhead in the Colorado Rockies at 20°F. That's just physics — roughly 1 PSI lost for every 10-degree drop in temperature. In snow, airing down to 20–25 PSI gives you more float and grip, similar logic to sand. On icy surfaces, traction is more about tire compound than pressure, but staying in that moderate-low range still helps.
Vehicle Weight and Load Matter More Than You Think
A bone-stock half-ton with nothing in the bed behaves very differently than the same truck loaded with recovery gear, water, fuel, and four days of camping supplies. Heavier loads require slightly higher pressures to maintain proper sidewall support and prevent excessive heat buildup. If you run the same 18 PSI loaded that you'd run empty, you're asking the sidewall to work harder than it's designed to — and that's where failures happen.
As a general rule, add 2–4 PSI for a heavily loaded rig compared to your baseline setup. It's not a dramatic change, but it matters.
Getting It Wrong: The Real Consequences
Underinflation on the wrong terrain doesn't just hurt your fuel economy (though it does — noticeably). It generates heat in the sidewall, which weakens the rubber compounds over time and can cause catastrophic failure with no warning. It also puts you at risk of a rolled bead, where the tire pops off the rim — especially during hard cornering or when taking a hit on a ledge.
Overinflation on the trail is its own problem. That stiff contact patch bounces and skips over terrain instead of gripping it. Steering feedback goes numb. You lose the compliance that makes technical driving manageable. And on rocky terrain, a hard tire transmits every impact directly into your rims, suspension, and frame.
Tools You Actually Need
A quality digital gauge — not the cheap stick gauge rattling around in your glovebox — is non-negotiable. Brands like Longacre, Accutire, and JACO make reliable options for under $30. For airing back up, a quality onboard compressor or a portable unit like the ARB Twin or Viair 400P will get you back to highway pressure without waiting 45 minutes at a gas station.
Air-down valves like the Staun automatic deflators let you set a target pressure and walk away while they do the work. Convenient, and they remove the guesswork when you're in a hurry to hit the trail.
Find Your Sweet Spot, Then Write It Down
The best approach is to treat tire pressure like any other tuning variable: test it, pay attention to the results, and keep notes. After a few trips to similar terrain, you'll have a solid baseline for your specific rig, your tires, and your typical load. That's more valuable than any generic chart.
Talk to other wheelers at the trailhead. Ask what they're running. Compare rigs. The off-road community is genuinely good at sharing this kind of practical knowledge — use it.
Your sidewall isn't going to save you when you're axle-deep in a sand wash or crawling a rocky shelf trail. The right pressure will. Start there.